Showing posts with label Do It Herself. Show all posts

Wednesday, February 5, 2014

TEASER ALERT!!!!

Hi Guys & Dolls,
HAPPY HUMP DAY!!!
This is just a teaser or "Prelude To A Post", lol.  Stay tuned to the WifeyMom Blog to figure out what these two things have in common.

Pink Turban Scarf

DIY Colorful Clutch-Made By Me
        
Silly Face ;0)

Have a great day!

Tuesday, December 20, 2011

It's Beginning to Look A Lot Like Christmas...


Well A Great Big Hello To Ya Folks!
With all the hustle and bustle around here I haven't taken the time to do any blog posts.  It's been great learning along with my boys as we get accustomed to our new homeschooling schedule.  Besides all of that, the hubby and I are seeing tremendous strides in our new business. 
I'll tell you a little more about that in a later post.
Our tree has actually been up since the day before Thanksgiving but I am just now taking a moment to show you a few pics.  The boys and the hubby are feeling in the Christmas Spirit thanks to all the sparkly decor.  All of my tree ornaments were purchased from Wal-Mart at the end of last years Christmas season.  Our tree is artificial and was purchased from, you guessed it, Wal-Mart over 6 years ago.  I love that tree.  It's beautiful and it's branches go all the way to the floor.  I would still like a white tree next year but I am not getting rid of my green tree.  I'd also like to get our stockings monogrammed next year as well.
So without further a due....


Hope you enjoyed them.  What is your color scheme?  Did you opt not to put up a tree this year?  Tell me about your Christmas Decor.
Until we read again...Happy Blogging!


Monday, November 14, 2011

Beautification of the Stairs...Teaser


Hey Blog Fans! :0)

It's been too long and I've missed you all.  While my computer is almost back on track I've discovered the Blogger App and am loving it!  Now onto our topic.

I'm coming to you tonight with a bit of a teaser.  My latest project if to spruce up my stairs.  They're one of the first things you see when you walk in our front door.  I want to give them a makeover and a signature presence of there own.  The hubby is all on board, well kinda.

Check out the pics to peak your curiosity.   Stay tuned...Blog ya later :0)

Published with Blogger-droid v2.0.1

Wednesday, October 12, 2011

The No Sew Window Treatments

Hello WifeyMom Followers,
Today I bring you more crafty ideas from the mind of WifeyMom herself...Me.  I have had a project on the cutting room floor of my mind for sometime.  It has evolved a few times for one reason or another.  I am talking about my family room window treatments.  Although we are working with a bit of color in the room with the nice dots on our chairs and ottomans I still felt it needed some pop of color. (and so did the hubby for that matter)  After much consideration, I decided on simple drapery panels that would frame our sofa.
I also decided, after not much consideration at all, that I did not intend on taking out my sewing machine to do the job.  So I went out and had some custom made, NOT!  Come on folks, they're only two panels not a full on widow covering.  Keep on reading to see how I achieved this.


My Supplies:


Lay out your fabric and measure to the desired length then cut.


Now fold over all your edges and glue them.


Let stand for glue to dry.  Since there are 12 clip rings I put 6 on each drapery panel. (And she's good at Math too!)
I hung the rod, then the drapes on the rod and Tah Dah!


Please forgive the not so great pics.  But I still love my drapes!

Do you have any windows that need an accent?  Are you daring enough to try this method?  Tell me your thoughts.

Tuesday, October 11, 2011

The Journey of the Entertainment Center

Oh the projects, they are never ending...And I love every minute of it!
Now, the entertainment center area in our family room has been ever changing.  Here are a few pics of its metamorphosis:


The Early Years...
Saddening I know, But don't you cry for me Argentina because
 wait til you get a load of the finished product.


This little beauty was a piece that I refurbished and showed to you in a previous post. 
It was my mother-in-law's dresser when she was a kid.
I absolutely love this as my entertainment center.  Aside from the one-of-a-kind look it has sentimental value.  However, it gets lost on the wall much like that poor excuse for a TV stand in the first pic.

My hubby gave a Diaper Party for a friend of his that was expecting a baby.
Just wanted you to know that we don't usually keep diapers and gift bags
stacked next to the TV in our family room, lol. 
Oh and I'm not sure who those poorly moisturized feet belong to. 
Surely one of the party goers.


So what's a girl to do?  Why use what she's got on hand of course.  My hubby had this one lonely speaker in our family room because the "mate" to it was acting as an end table of sorts upstairs, with its non-operational self.  So I brought it downstairs from the game room to create some semitry (that I am normally against).  Along with two lamps from a set I already had and two of the panels from a 3 panel screen/divider that was hiding out in our garage.  I also had a pretty iron piece that was intended for the foyer.  I put it all in place where it made the most scence to me and here it is...


*Que the Stevie Wonder music* "Isn't she looovelyyyy, Isn't she wooonderrrful..."
Ahhh, big sigh!  I love it.  It's just the right presence for the wall size and it was all re purposed.  Here are a few more pics...cuz I am in fun-i-chu LOVE with this set up!


Mmm, hmm, I see ya looking at those drapes on the far right...Well, don't worry your pretty (or handsome) little head, there will be a post on them soon, The No Sew Window Treatments.


Stay on the look out for more Do It Herself posts and Before & After pics of it all.
Stay Inspired ;0)


Monday, October 3, 2011

From Dresser To Entertainment Center

Gooooooood Mornin' WifeyMom Peeps!  I hope you're reading this post while you are in the middle of having an awesomely productive day...even though I'm not, Puh! lol
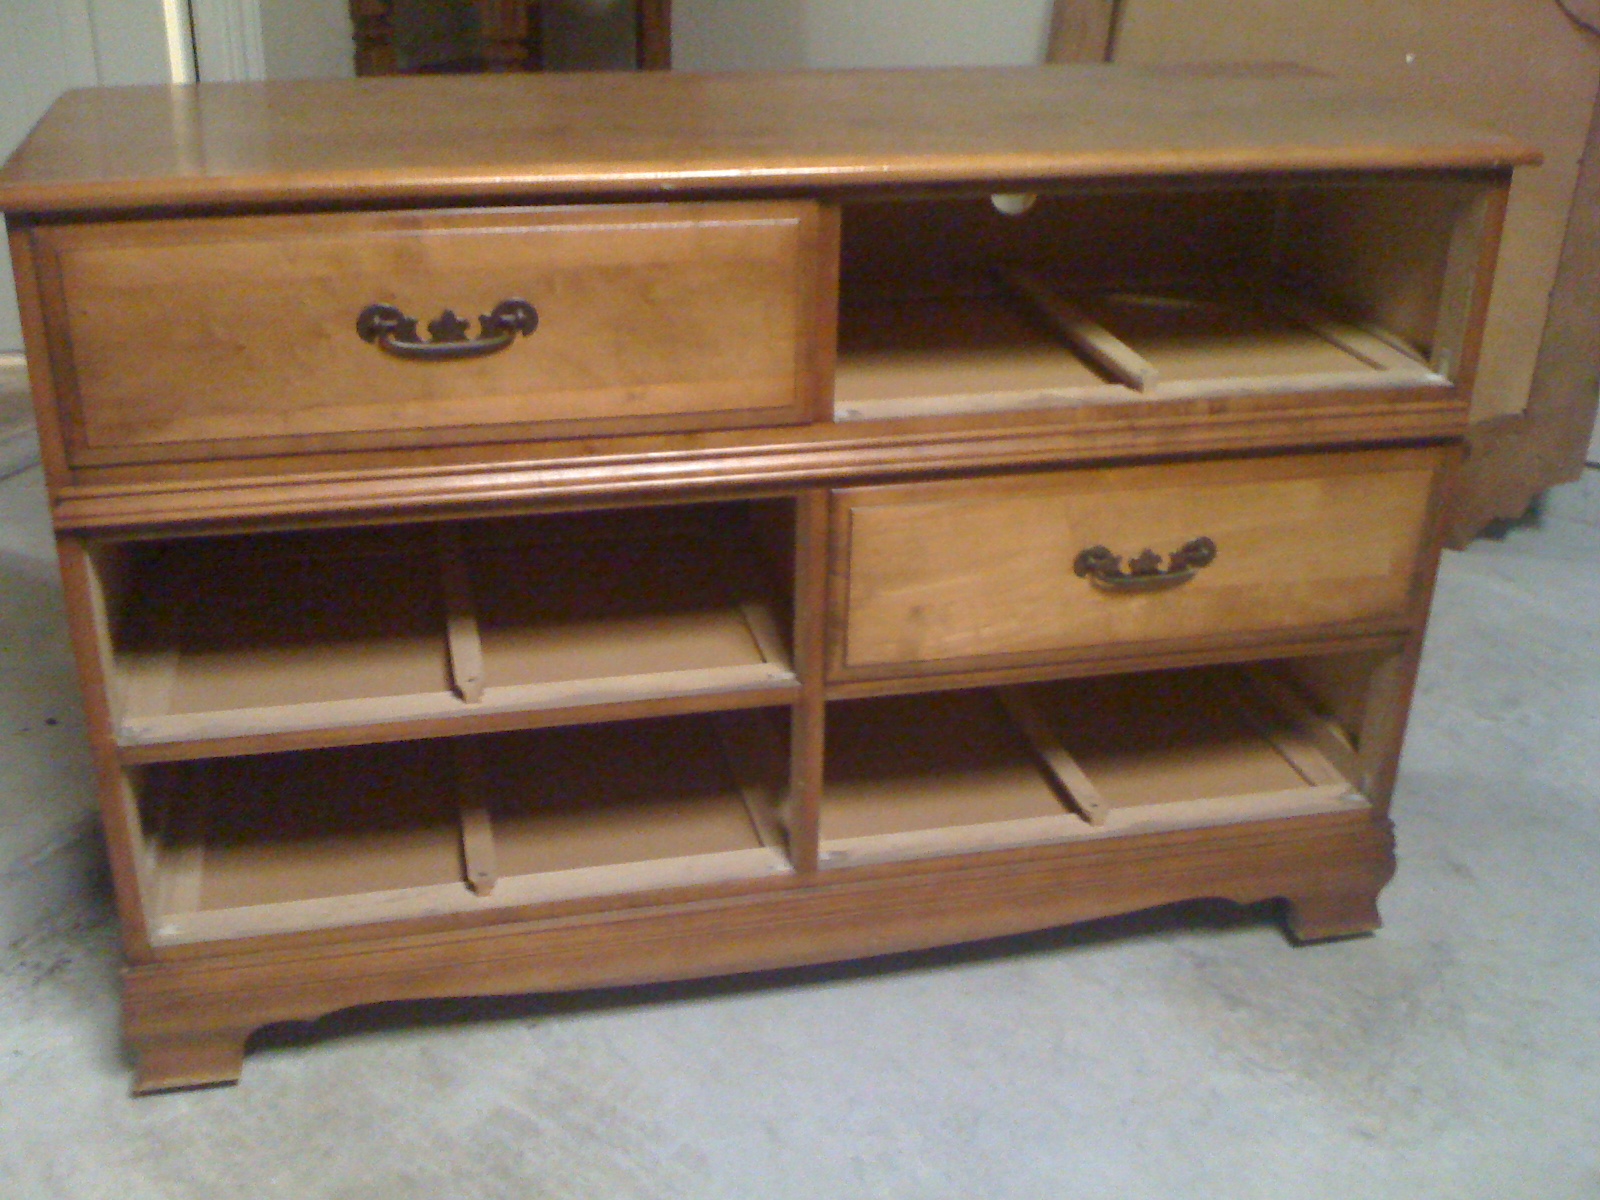
This little transformation started with a dresser that belonged to my mother-in-law when she was a kid.  The dresser had been at my husband's grandmother's house for many many years.  It was still in good condition but I couldn't see where it would fit into the decor that I had envisioned for our home just as it was.  In comes the trusty spray paint....


Here is what this little beauty looked like before:


I had already started sanding and painting before I took the pic.  What can I say, I was excited!

I started by removing the hardware and using blue painters tape to tape the holes on the inside of the drawer where the hardware was.  Then I used wood filler putty to fill the holes and the tape acted as a barrier to keep the putty in place and from falling into the drawer.  After setting the drawers aside to let the putty dry I moved on to wiping down the dresser so as to have a clean surface to prime.  I used 4 spray cans of Kilz.

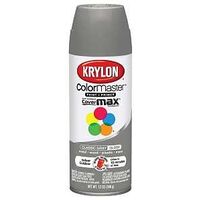
By the time I was done priming, the putty on the drawers were dry.  And that's when I figured it out.  What is "IT" you ask?  "IT" is realizing that putty sometimes shrinks when it dries and therefore left more space that needed to be puttied (is that a word? not sure, but I'm going with it)  So putty again I did.  Side Note: I had to putty the holes because the new drawer pulls had a different hole placement.  While the second putty job was drying I went back to the dresser and sprayed it down with this magic stuff...

 Krylon Indoor/Outdoor in Classic Gray


After sanding down the drawer fronts where I had puttied, then priming and painting the dresser & the drawers I allowed it to dry.  I chose the top two drawer openings (sans the drawers themselves of course) as my electronic roosting place.  I taped off the exterior area around the openings and painted it black inside.  With my handy dandy drill attachment my husband's handy dandy drill attachment I carved out a circle at the back of each opening for any cords to fit through.  I just love my drill my husband's drill. 


Hey Pretty Girl, MUAH!


When all that was done I applied an antiquing glaze.  For this process you brush a bit of glaze over the painted furniture then wipe it off with a clean lint free cloth.  You need to work in small areas at a time.  It leaves behind a beautiful look.

Now on to the hardware.  I searched and searched for something at a great price.  I found some at the best price I could on eBay.  At least I thought it was the best price until I payed a visit to my local Home Depot.  Even though I had a feeling that the Depot would not beat eBay I strolled down the hardware aisle anyway.  BOY, am I glad I did.  I turned the corner and began to peruse the shiny silvery furniture jewelry.  Out of my left peripheral I could see a small box in a bin that looked a bit out of place. (yes my brain grasped all that in a matter of seconds)  When I turned and looked and began to read the label I realized it was a clearance box of drawer pulls that was a return from a special order.  I don't know if angels hang out at The Depot often but I know I heard a few singing at that very moment.  When I read the price I wasn't too, too tickled but it was still a pretty good deal.  But man-o-man did I turn pretty good to really great.  I approached the department guy and with a bit of humor and a lot of patience (and a call the Asst. Store Mgr.) I walked out paying half off the clearance price.   Only $1.33 each times 18 drawer pulls.  That's the exact number I needed since I am refurbishing a chest of drawers also.


Look at that slashed price on the tag.  A beautiful site to behold!

Using this plastic guide that I got from The Depot I marked the new holes for the drawer pulls and got out that sexy lil' drill again. (heart pounds in anticipation) 


Next, I drilled the new holes and screwed in the new pulls.


Aaaaaaand Noooow.......


Voila!
The top first set of drawers look like 4 long drawers and 4 tiny drawers but it's actually 2 regular size drawers made to look that way.

Tell me what you think ;0)

Stay tuned to see the full transformation of the entire entertainment center area...
Later Folks :0)